4. Random coordinates#
Sometimes, we need to generate a random spread of points in 1 or more
dimensions. This can be used for random sampling methods or simply to
generate some synthetic data on which to test new methods. Generating
uniformly distributed values using numpy.random is great but doing
so in more than 1 dimension involves some boilerplate code that could be
automated. Bordado offers functions random_coordinates and
random_coordinates_spherical for this purpose. This is how they
work.
import bordado as bd
import matplotlib.pyplot as plt
import pygmt
4.1. Generating random points#
To generate uniformly distributed random 2D point coordinates, we use bordado.random_coordinates like so:
region = (0, 20, -45, -30)
coordinates = bd.random_coordinates(region, size=50)

for i, c in enumerate(coordinates):
    print(f"coordinate {i}:\n{c}\n")
coordinate 0:
[13.16824967 16.49502842 10.62093574 10.07048198 15.58387793 18.61389874
  0.13341541 10.09307933 18.92324894  9.21494279 16.49690378 13.58967867
 16.15229777  0.6654964  11.19398486 11.98170463 10.30733248  3.14701166
 19.01920354 18.40486518  4.3188327   7.7478626   8.81154783 10.30490482
  5.23728981  0.9081915   9.29897396 12.67795033  1.88526601 10.98949547
  5.0011571  17.40395564  1.63275455 10.66322692 10.95684519 10.08907861
  3.86900105  6.35227959  8.81881607 16.01290928  0.15440792  5.1998525
 15.95571769 15.22682363 18.79278204 15.10018066 18.74029866 18.71648086
 13.25201697 15.0502781 ]

coordinate 1:
[-33.40552842 -36.1592976  -36.2092456  -40.89377781 -41.29816704
 -30.60039866 -34.62656775 -42.79997664 -30.45822385 -30.37614214
 -31.22426721 -43.01719817 -37.18698595 -39.28133117 -39.45434951
 -41.4182669  -41.5880056  -37.45167905 -39.73177258 -32.3883842
 -35.15865773 -41.32428507 -44.9720579  -30.69884028 -38.77041513
 -33.48793716 -38.37442583 -34.82865281 -35.60481927 -44.69071413
 -36.11647609 -40.45160447 -33.44829288 -34.86932526 -42.92571905
 -44.11849165 -34.17056291 -32.97904907 -34.82777535 -39.91696102
 -33.43319747 -37.99069087 -39.1997926  -34.27564151 -40.44365809
 -36.80699521 -34.53126331 -41.39546819 -33.94944667 -34.50633044]
Since the region has 4 elements, it is assumed that there are two dimensions
in our problem and so 2 coordinates arrays are generated. Because the points are
uniformly distributed, there is only a size argument and no spacing like in
bordado.grid_coordinates or bordado.line_coordinates.
Hint
The values above will be different every time we run the function because
it will instantiate a new numpy.random.default_rng every time. We
can control the randomness by passing a random_seed argument. This can
be an integer seed or a numpy.random.Generator.
Let’s plot these points to see their distribution:
fig, ax = plt.subplots(1, 1, figsize=(8, 6), layout="constrained")
ax.plot(*coordinates, "o")
ax.set_aspect("equal")
ax.set_xlim(*region[:2])
ax.set_ylim(*region[2:])
ax.set_xlabel("Easting")
ax.set_ylabel("Northing")
ax.grid()
plt.show()
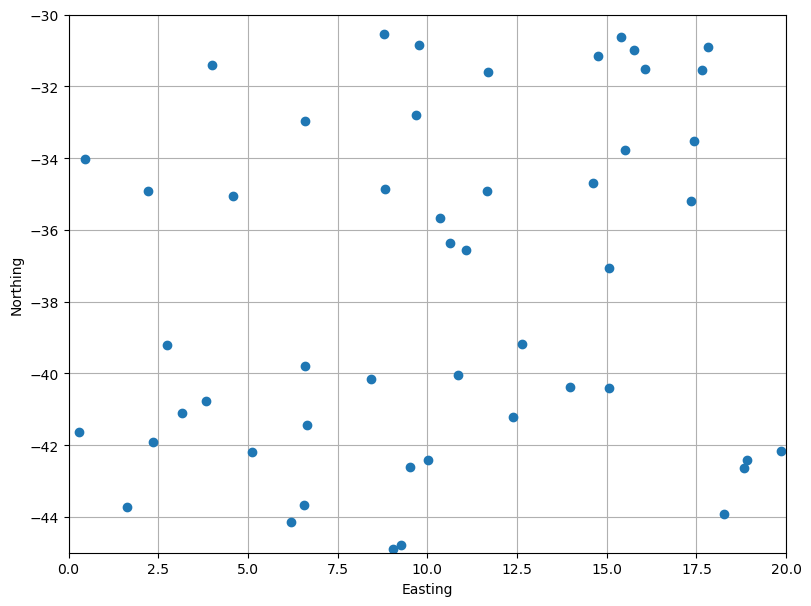
As expected, they are random and with no bias inside the given region (hence, uniformly distributed).
4.2. Random points on the sphere#
The method above is useful, but it shouldn’t be used with geographic longitude and latitude coordinates. Let’s illustrate why with an example. We’ll generate random points distributed globally:
region = (0, 360, -90, 90)  # W, E, S, N in degrees
size = 3000

coordinates = bd.random_coordinates(region, size)

fig, ax = plt.subplots(1, 1, figsize=(8, 6), layout="constrained")
ax.plot(*coordinates, ".")
ax.set_aspect("equal")
ax.set_xlim(*region[:2])
ax.set_ylim(*region[2:])
ax.set_xlabel("Longitude")
ax.set_ylabel("Latitude")
ax.grid()
plt.show()
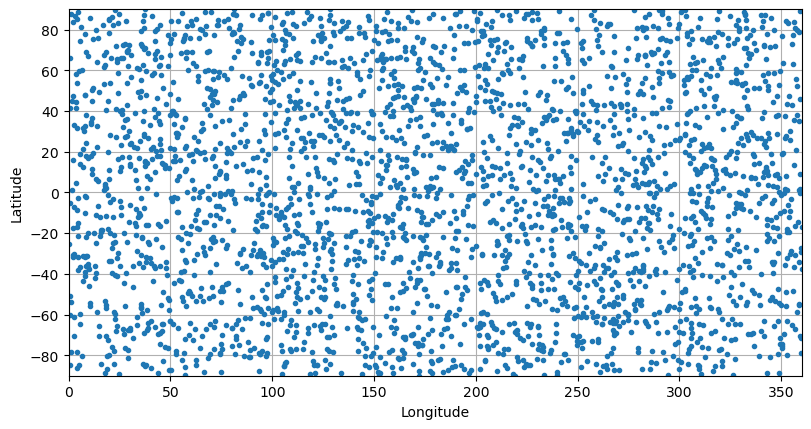
Plotted like this, things seem fine. But this type of plot can be very misleading for geographic data. If I plot them on a map using a cartographic projection, a pattern will appear:
fig = pygmt.Figure()
fig.coast(land="#cccccc", region="g", projection="W20c", frame="afg")
fig.plot(x=coordinates[0], y=coordinates[1], style="c0.1c", fill="seagreen")
fig.show()
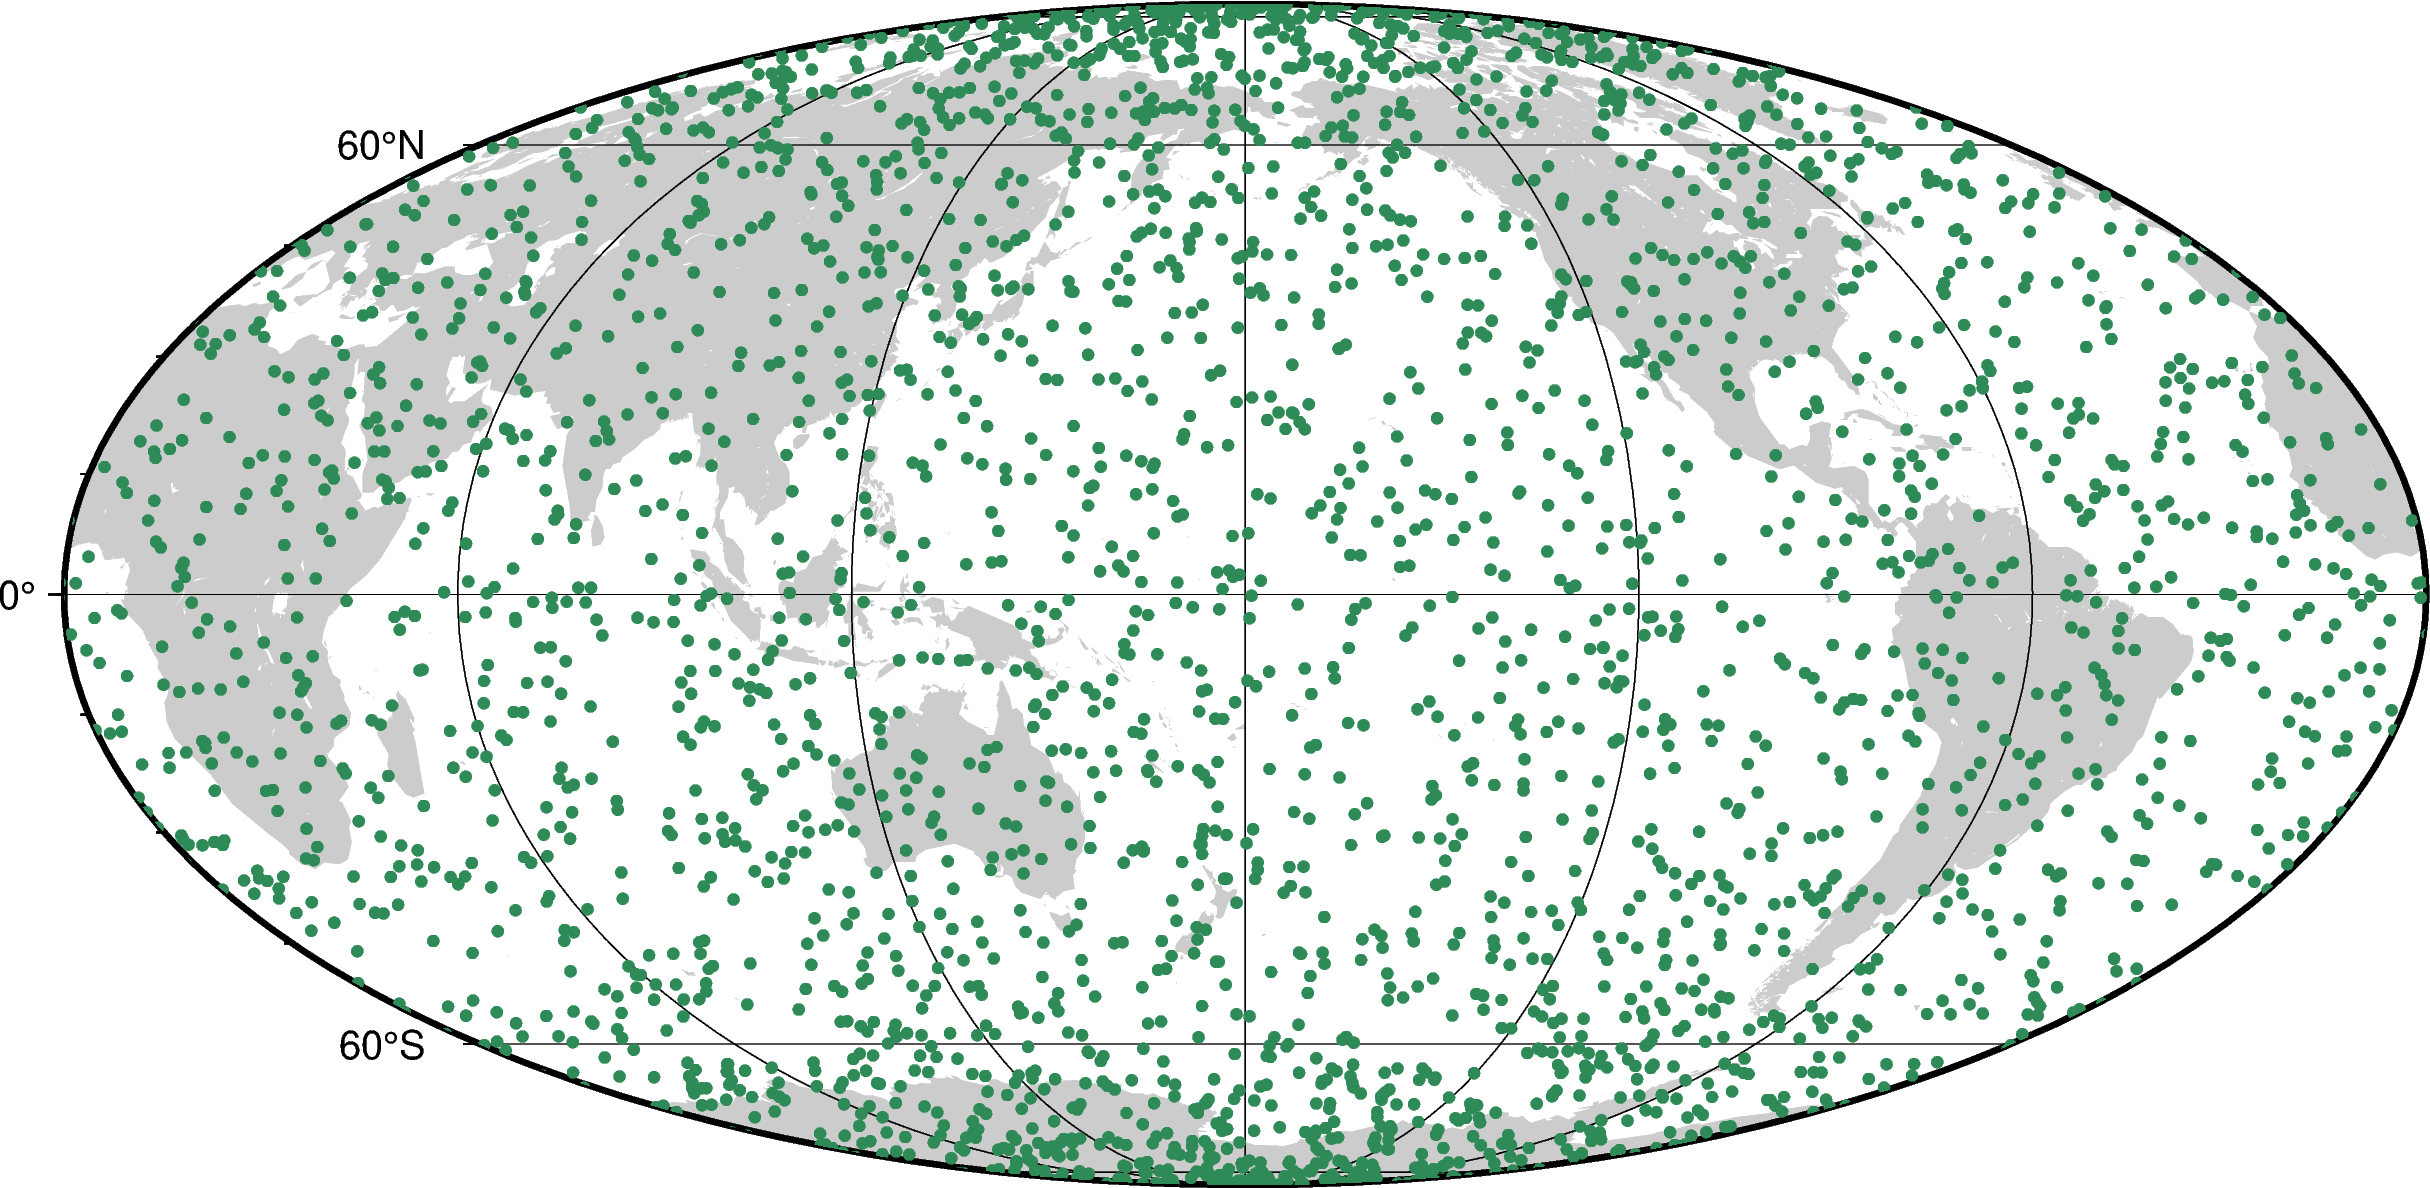
Now we can see that the concentration of points is larger at the poles than at the equator. This is because the meridians of longitude converge at the poles. Hence, a degree of longitude corresponds to a smaller and smaller physical size on the surface of the Earth towards the poles.
See also
The map above was generated with a Mollweide projection, which is an equal-area projection.
To generate random points on a sphere that have a uniform distribution, we
can use bordado.random_coordinates_spherical, which accounts for this
convergence of meridians:
coordinates_sphere = bd.random_coordinates_spherical(region, size)

fig = pygmt.Figure()
fig.coast(land="#cccccc", region="g", projection="W20c", frame="afg")
fig.plot(x=coordinates_sphere[0], y=coordinates_sphere[1], style="c0.1c", fill="seagreen")
fig.show()
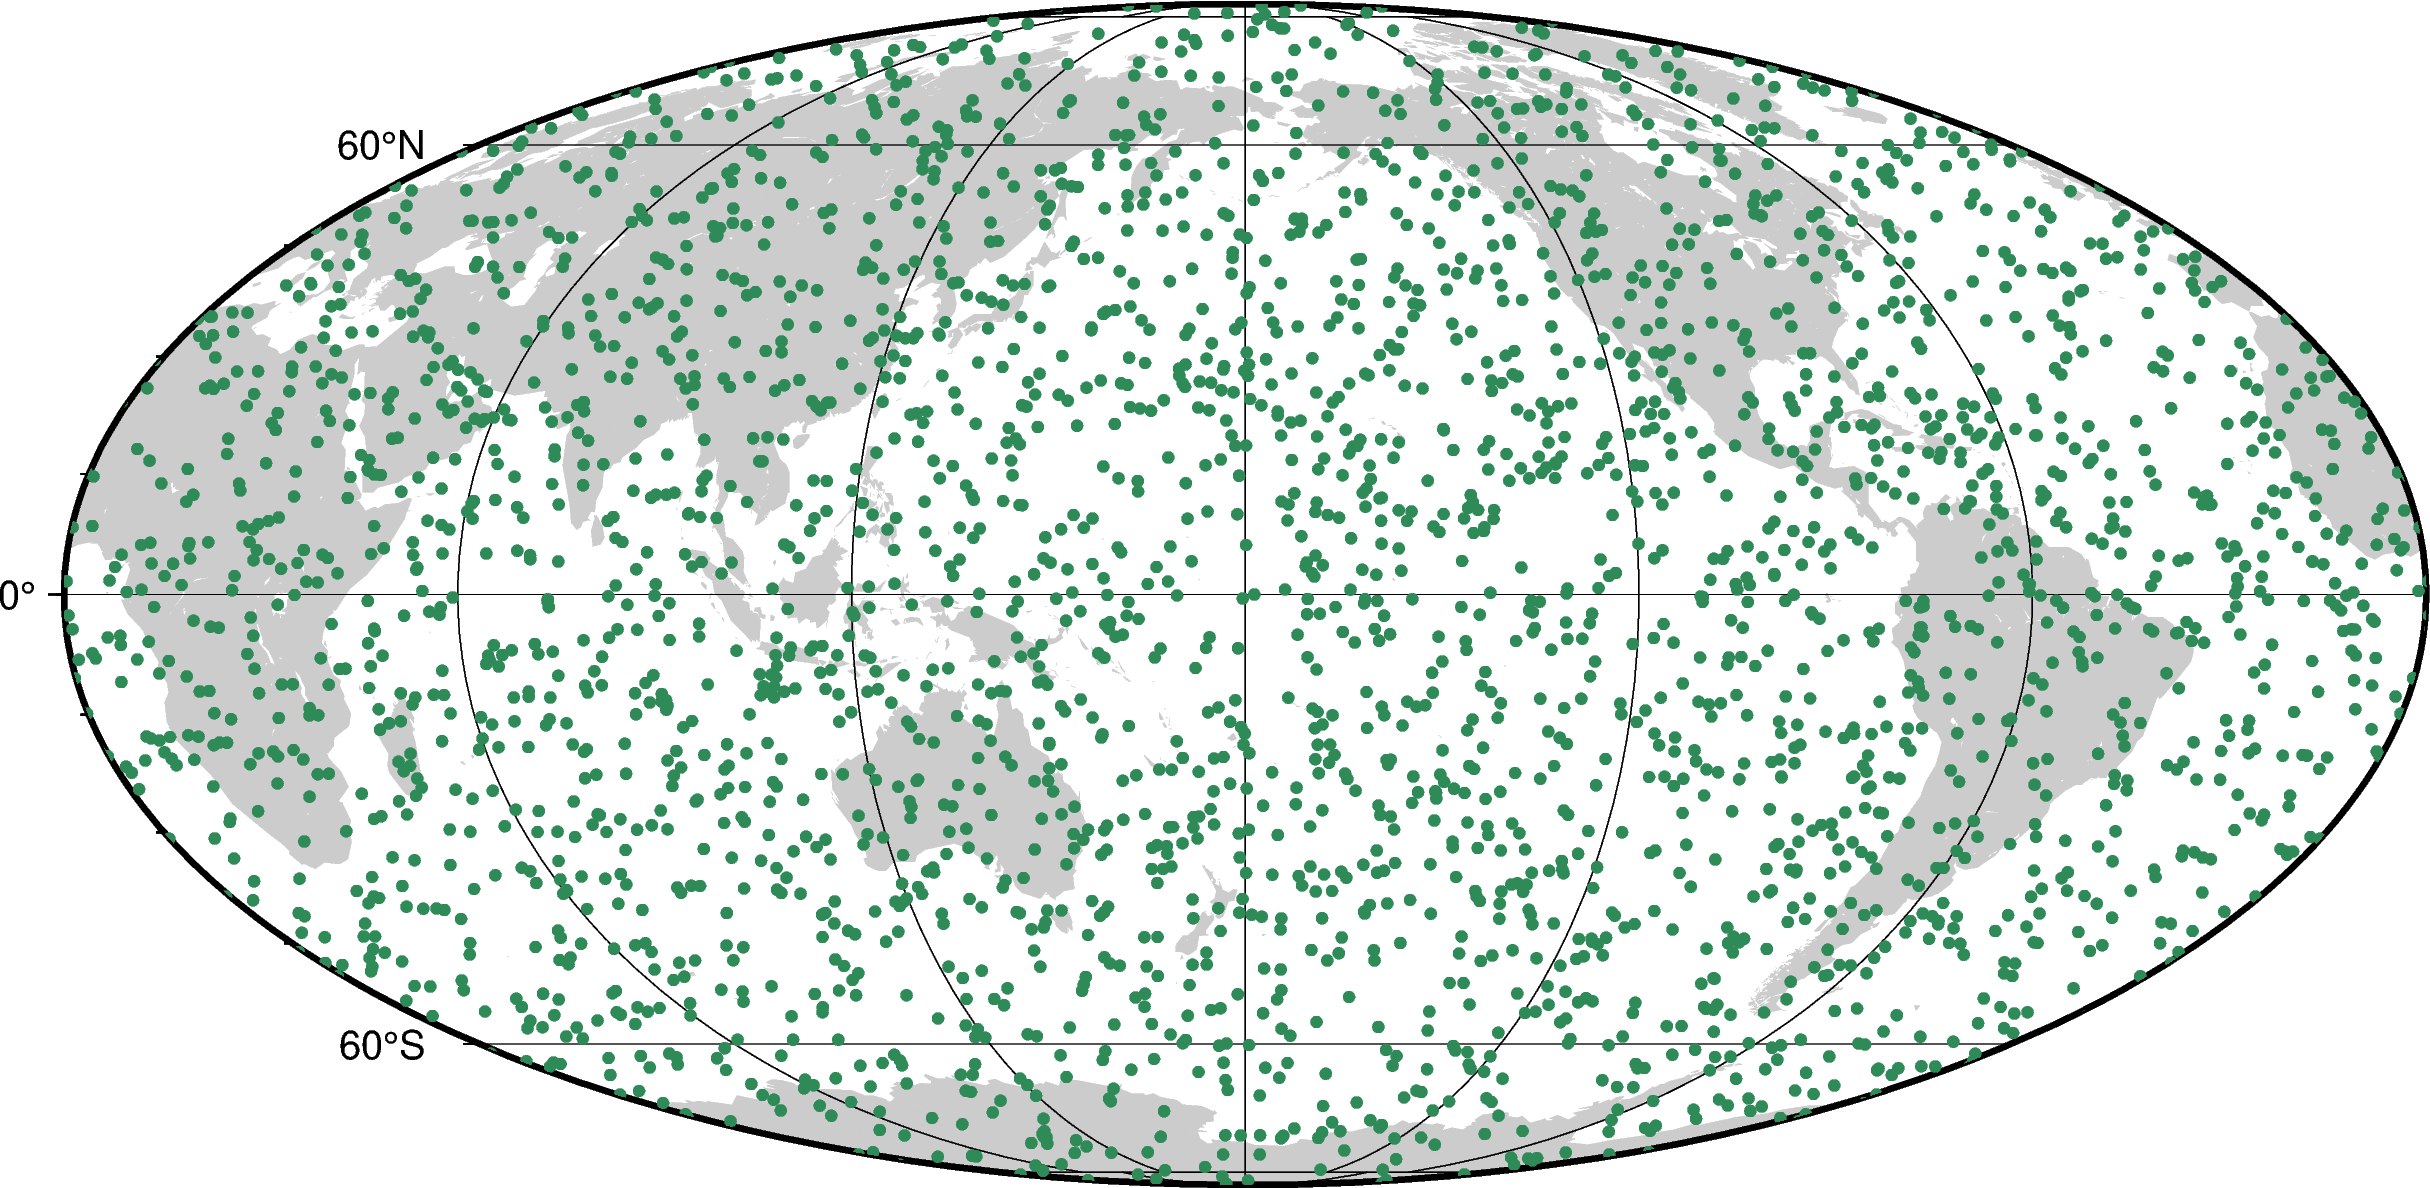
Notice that now the point concentration is uniform on the Earth.
4.3. What’s next#
Now that we can make some synthetic data with random points, let’s see how we can split and segment the data based on spatial blocks and windows in “Splitting points into blocks”.
Have questions?
Please ask on any of the Fatiando a Terra community channels!